How to create folders in Gmail – When you don’t know how to create folders in Gmail, your inbox controls you. Each time a new message arrives, you’re more disorganized than ever.
Folders help you streamline your inbox and boost email productivity. It’s time to take control and change your inbox from a cluttered mess to a picture of success.
How to create folders in Gmail
Below are the simple tricks to organizing your old messages plus a bonus way to create folders for future emails.
First thing’s first: In Gmail, folders are referred to as labels. Now, this part’s easy. Like, really easy.
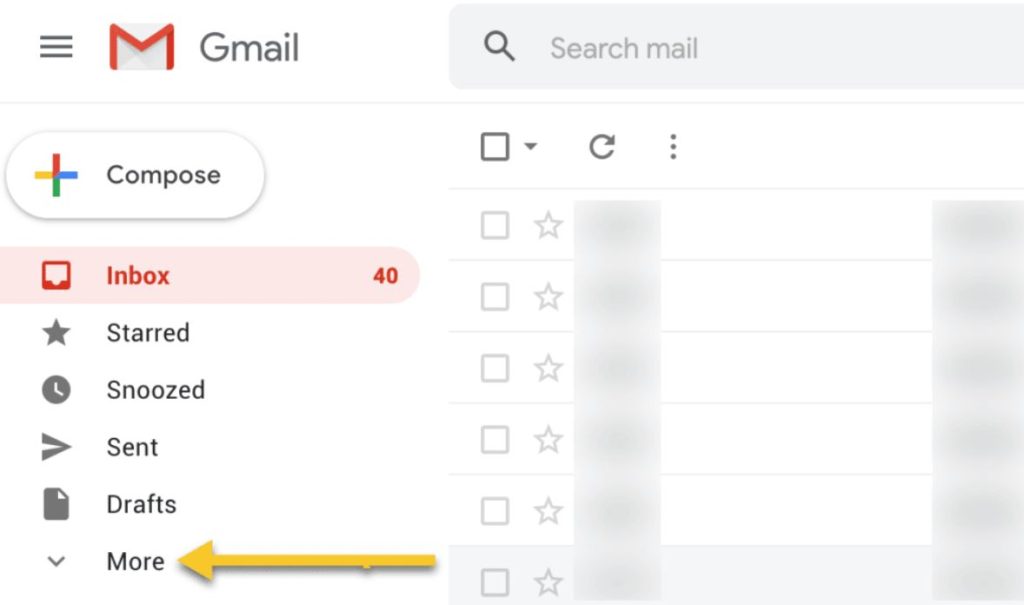
To create a label (Folder), all you have to do is go to the left side of your inbox and click More. From there, you’ll see the option Create a new label. In the pop-up window, name your label:
Note: You’ll also notice the option to Nest label under — where you can create new subfolders.
Let’s say, for example, you have a main folder for Google Alerts and you’d like to organize alert emails by month. You could create a label “Google Alerts” and then subfolders like “January” and “February” to nest each month underneath.
Another way to create labels is by going through Settings:
- Click the Settings icon.
- Go to the Labels tab.
- At the bottom, click Create New Label.
- Name the label.
- Click Save.
How to Quickly Add a Label to a Message Sent To You
Now let’s go over how to create folders in Gmail for messages already in your inbox:
- Open the message.
- Click the Label button (It has a tag icon).
- Check off each label to want to add, or type a new label.
Pro tip: Add labels to multiple messages by selecting the emails from your inbox view and then clicking the Label button.
Want your templated emails to be even more effective? Email tracking will notify you when a recipient reads your emails, clicks a link, and views attachments.
How to Turn a Nest Label Into a Parent Label
- In Settings, click Edit in the Actions column (for the label you want to move).
- Make sure the Nest label under is not checked.
- Click Save.
How to Add a Label to a Message You’re Sending
This trick comes in handy when you’re sending outgoing messages that you want to be labeled:
- Click Compose.
- In the bottom right corner, click More options.
- Click Label.
- Choose a label to add.
How to Create Folders For Future Emails
What if I told you that you could set up folders for future emails that would save you time writing and searching for old emails?
That’s why we created a tool that does it for you. It’s called Templates, and it appears as a button in your inbox.
The end picture: Your future emails are already written for you — they wait for you to add custom info and press “send.”
Here are some benefits of having a template library:
- Quick, easy organization: Categorize your messaging (cold emails, follow-up, break-up, etc.) for fast reference.
- Pre-filled messaging: The information you keep typing is already there for you, with placeholders for the info that changes. What does it mean for you? Fewer mistakes, more time saved. It’s a win-win.